
Selenium is a tool broadly utilized for automated testing of web applications. One stage ahead, incorporating the selenium Jenkins integration takes it to the next level.
Jenkins is an open source tool written in Java. It gives constant conveyance and consistent integration benefit for software advancement. It automates your manual task of code arrangement process from advancement box – QA – Stage – Production.
Jenkins underpins numerous modules which you can coordinate, for example, Git, SVN; manufacture the pipeline and some more.
The fundamental functionality of Jenkins is to execute a predefined rundown of steps on the premise of time and a few events.
For instance, when you need to construct the execution relying on time you can run work at regular intervals, or if you need to build it concerning an event, you can do as such after another confer in a Git repository.
Benefits of selenium Jenkins integration are:
- It is a cross-stage and can utilize on Mac OS, Windows, Linux, and Solari conditions.
- It is a free and open source tool.
- Utilized and all around reported.
- Reconciliation with the wide assortment of technologies and tools.
Step by step guide of Selenium Jenkins integration:
Section 1-Download Jenkins
First Step-Open your web program and after that Navigate to Below URL
http://jenkins-ci.org
This is the official site of Jenkins
Second Step-Now download Jenkins.War record and save to desktop or some other area relies on your decision.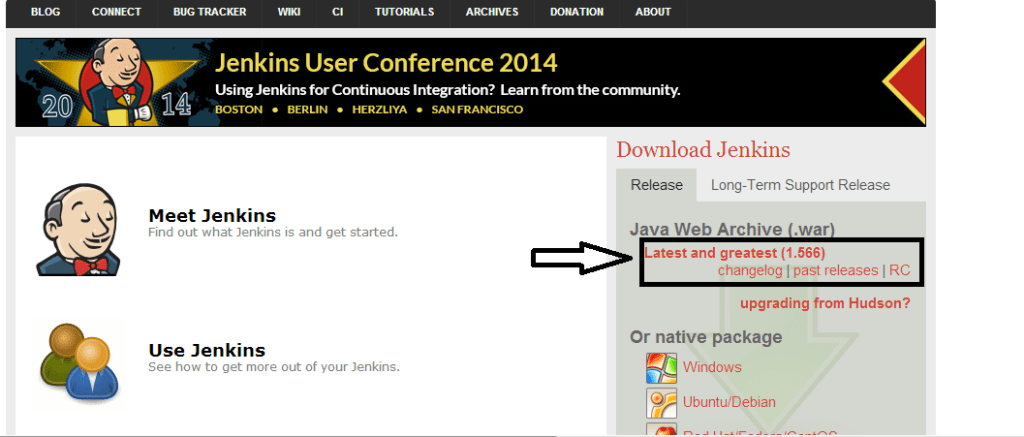
Third Step-Once download. You will get Jenkins.War record that we have to execute.
Presently how about we explore another section
Section 2-How to design Jenkins integration with selenium WebDriver:
First Step-Go to the location where Jenkins.war is accessible.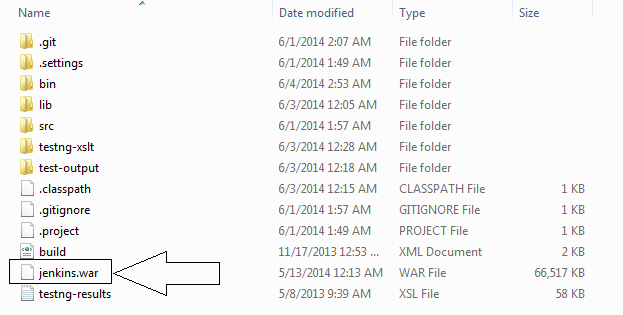
Second Step- Open Command incite knows as CMD and explore to project home catalog and Start Jenkins selenium server
Begin cmd> Project_home_Directory> java – jolt Jenkins.war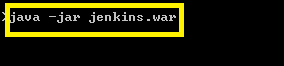
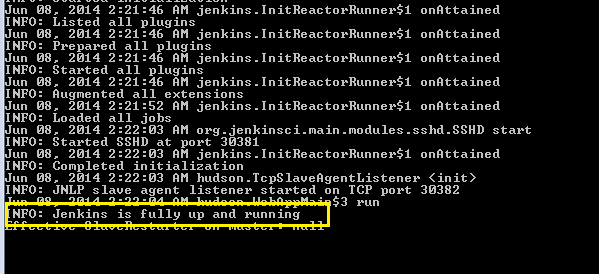
Third Step-When Jenkins server is up and running; you will get a success message.
By default, Jenkins keeps running on 8080 port so you can explore beneath URL for Jenkins UI
Open any program and sort the URL http://localhost:8080
Presently Jenkins in up and running so now we need to arrange Jenkins with the goal that we can execute our test case using Jenkins selenium plugin.
Fourth Step- When Jenkins in selenium is running so; we are practically done however before moving to create build we have to design Jenkins with the goal that Jenkins can recognize different tools also like Java, Maven and so forth.
Tap on > Manage Jenkins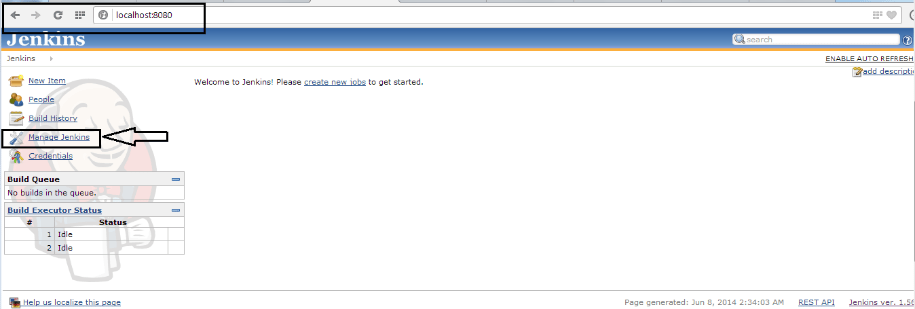
Tap on Configure System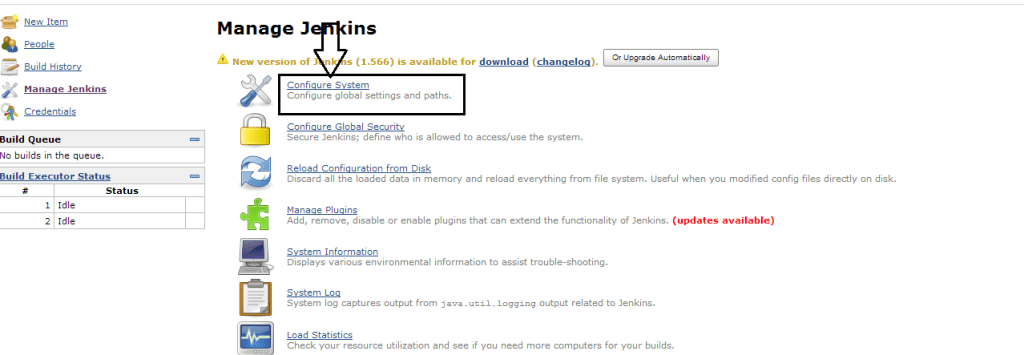
Here we are disclosing to Jenkins that our java situated at this location, so we don’t need to stress over the precise way.
Explore to JDK area and Click on Add JDK button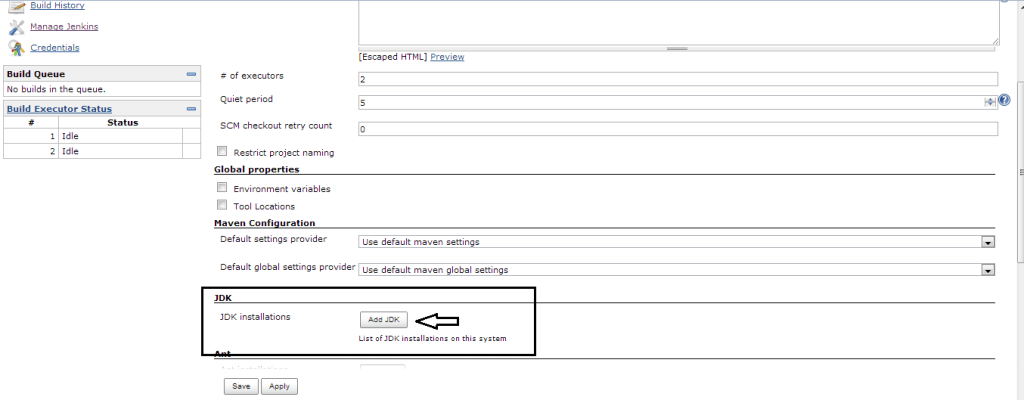
Uncheck Install automatically check box so Jenkins will just take java which we have specified previously.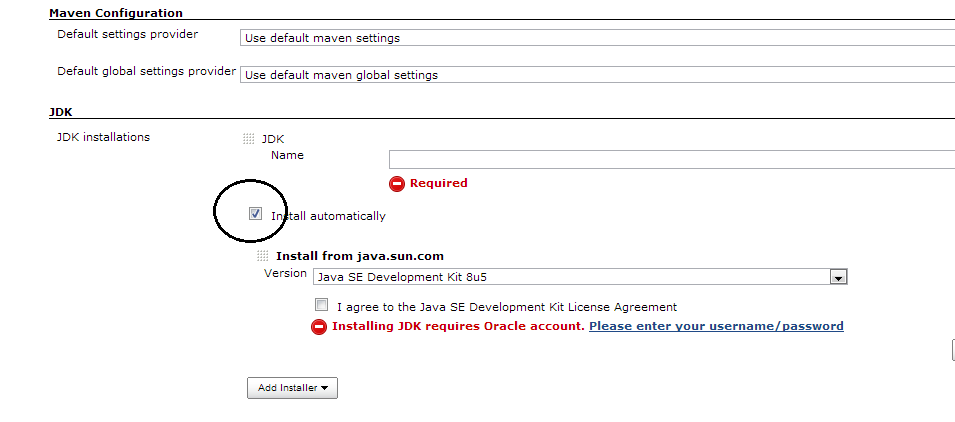
Give the name as JAVA_HOME and Specify the JDK way.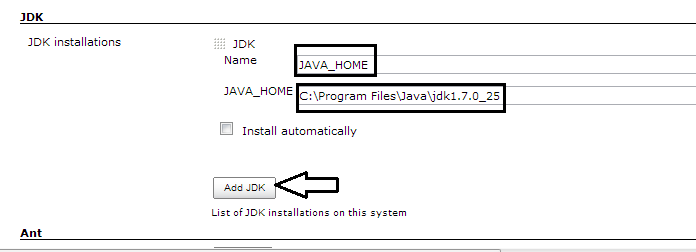
In selenium continuous integration Jenkins, we have a decent component that you can arrange email notice for the client.
This is discretionary yet in a case you need to design Email notification then you need to do small setting while at the same time arranging Jenkins
Refer to screenshot you can change login details and tap on Apply.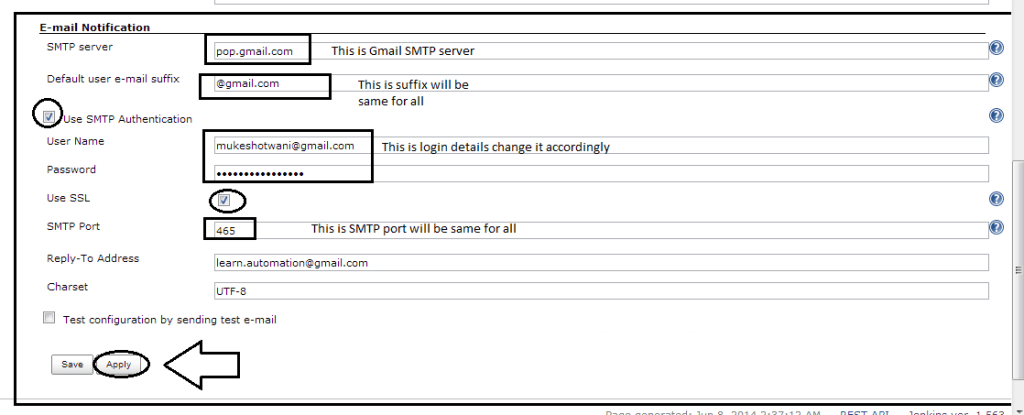
Once done click on “Save” and “Apply.”
Well done, your selenium webdriver integration with Jenkins designed at this point.
Section 3-Execute Jenkins selenium webdriver TestNG
We can execute test cases in Jenkins utilizing four ways referred the beneath screenshot
In this post, we will execute utilizing Window batch command
First Step-Create a batch document first then we will add a similar cluster record to Jenkins
A-To makes the batch document we have to set classpath of TestNG so we can execute testng.XML records
Our task structure should resemble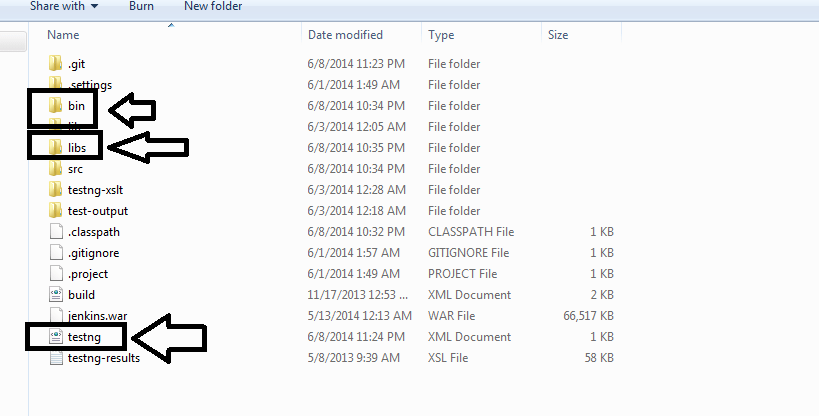
B-Open command provokes and set the classpath-
While setting classpath, we will set the way of canister envelope and libs organizer
Home index > set classpath=C: \Users\Learn-automation\bin;C:\Users\Learn-automation\libs\*;
C-Open notepad and write the underneath command and save as .bat document-
java – cp bin;libs/* org.testng.TestNG testng.XML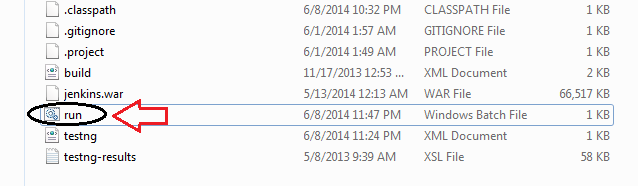
Second Step-Make a task in Jenkins which will execute our build
Open Jenkins on program (sort http://localhost:8080)
A-Click on the new thing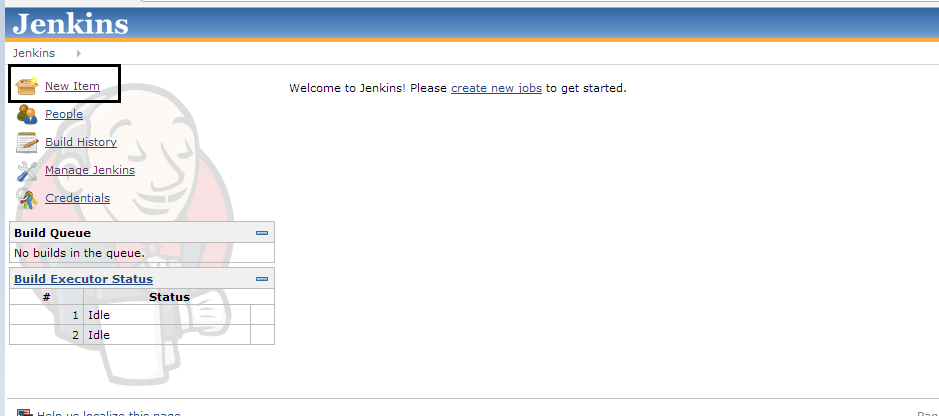
B-Give, the Task-Name, select Build a free-form software project and Click on “OK” button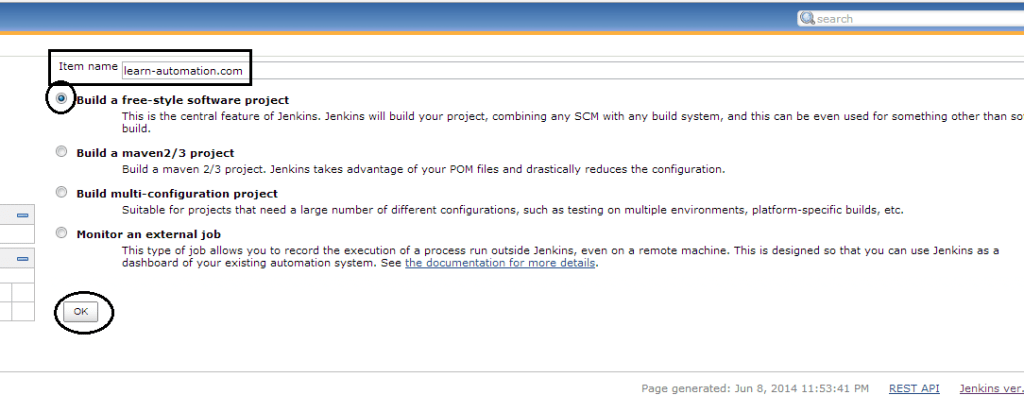
C-Navigate to Advanced Project Options > Check the utilization custom workspace > in index we will determine the project home catalog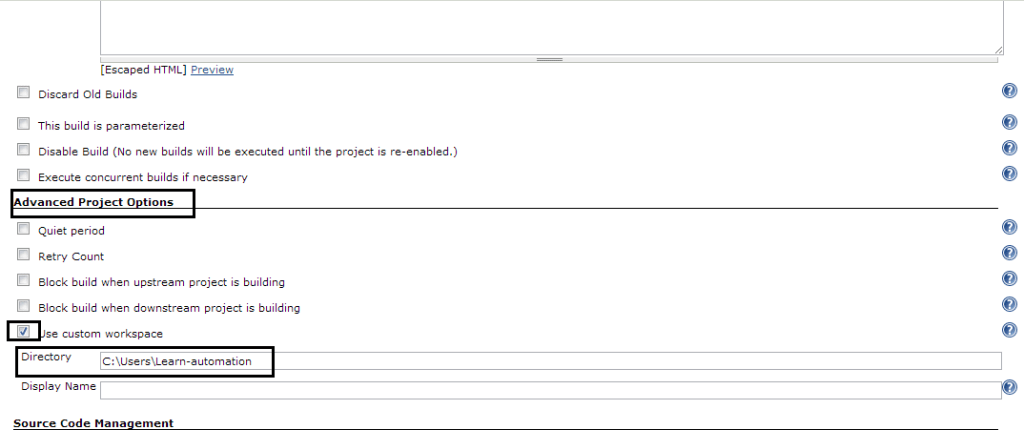
D-Important part now determine the Add Build step >Click on Execute Windows batch command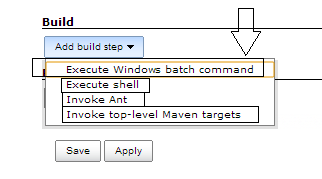
E-In the area, please indicate the batch command which we made, and tap on Apply/save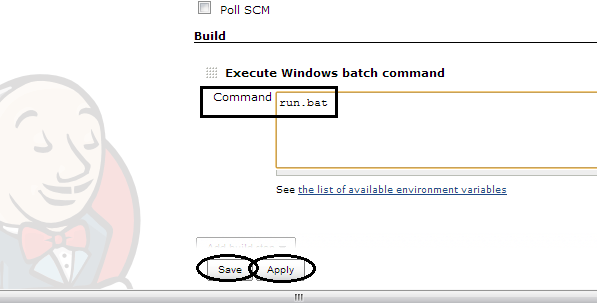
Third Step-you can at long last run the Build > Click on Build now alternative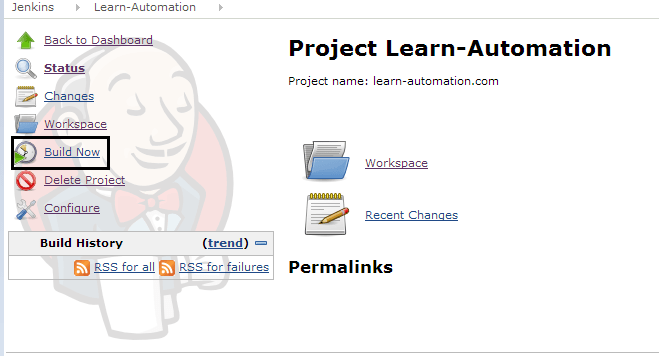
Fourth Step-Check Build history and Console output and confirm the outcome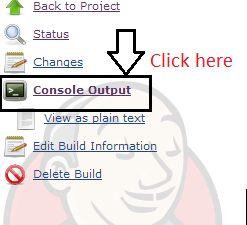

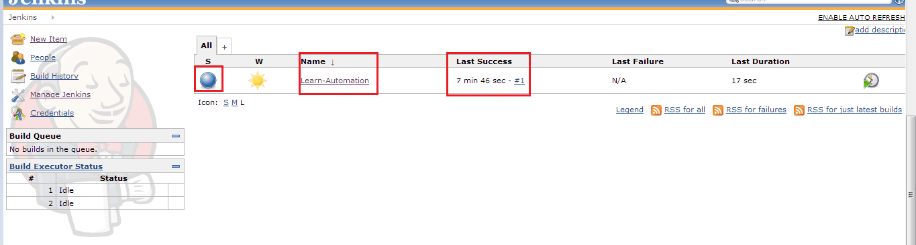
Selenium Jenkins integration gives you to run your script each time there is any change in software code and conveys the code in another condition. With Jenkins, you can save execution history and test reports.
So, trigger selenium from Jenkins is extremely valuable when you have test cases prepared, and you need them to run utilizing a single click. We can make or calendar a work to run the test cases using a batch document.